The Remote Fartinator
Project info
Hack Idea for the Mark Rober CrunchLabs Hack Pack Kits
Credits
Original Idea: The Kiddo!
Time & Space
St. Louis - 2026
#HackPackContest
Let's Hack your CrunchLabs Hack Pack
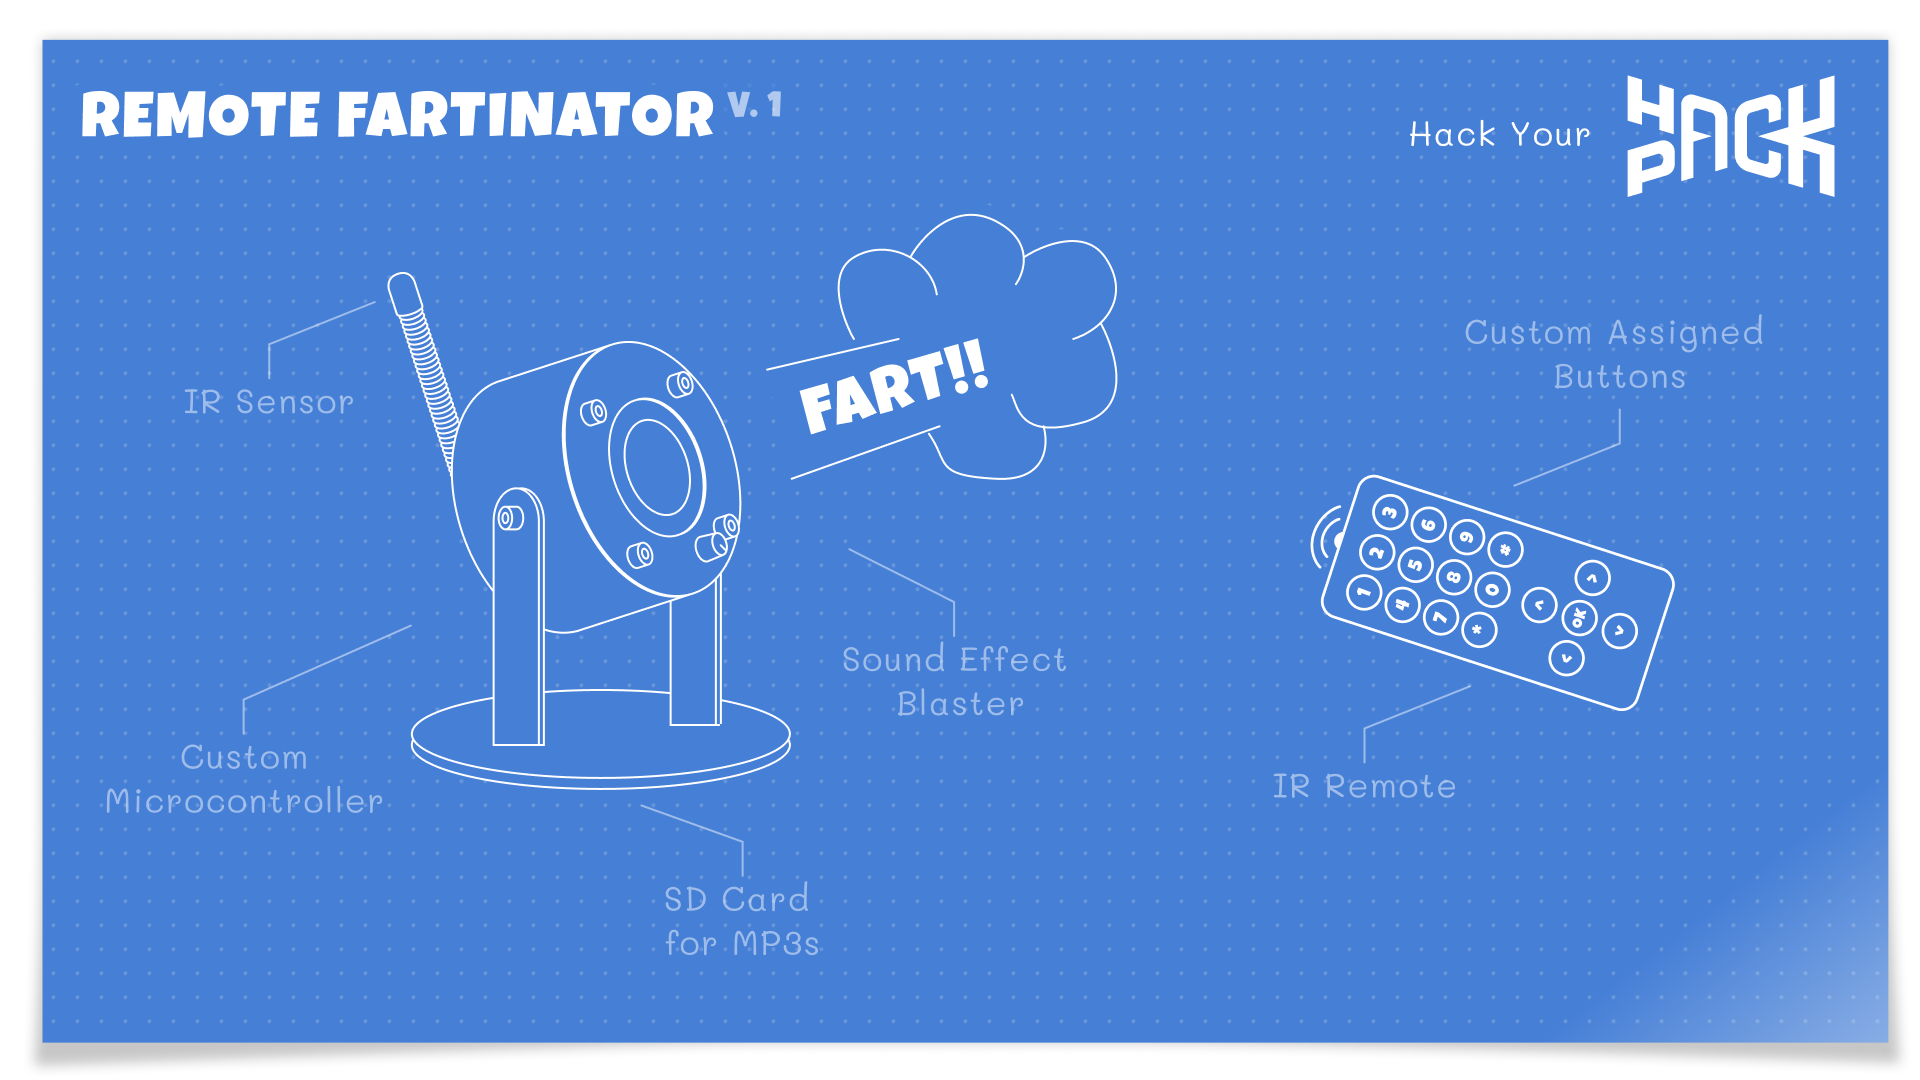
Looking for new fun ways to get the most out of your CrunchLabs Hack Pack? We've got you covered. My kiddo had the great idea to use parts from our little engineering subscription kits to make a remote farting machine we could use to prank his mom. We got to tinkering and here's what it took.
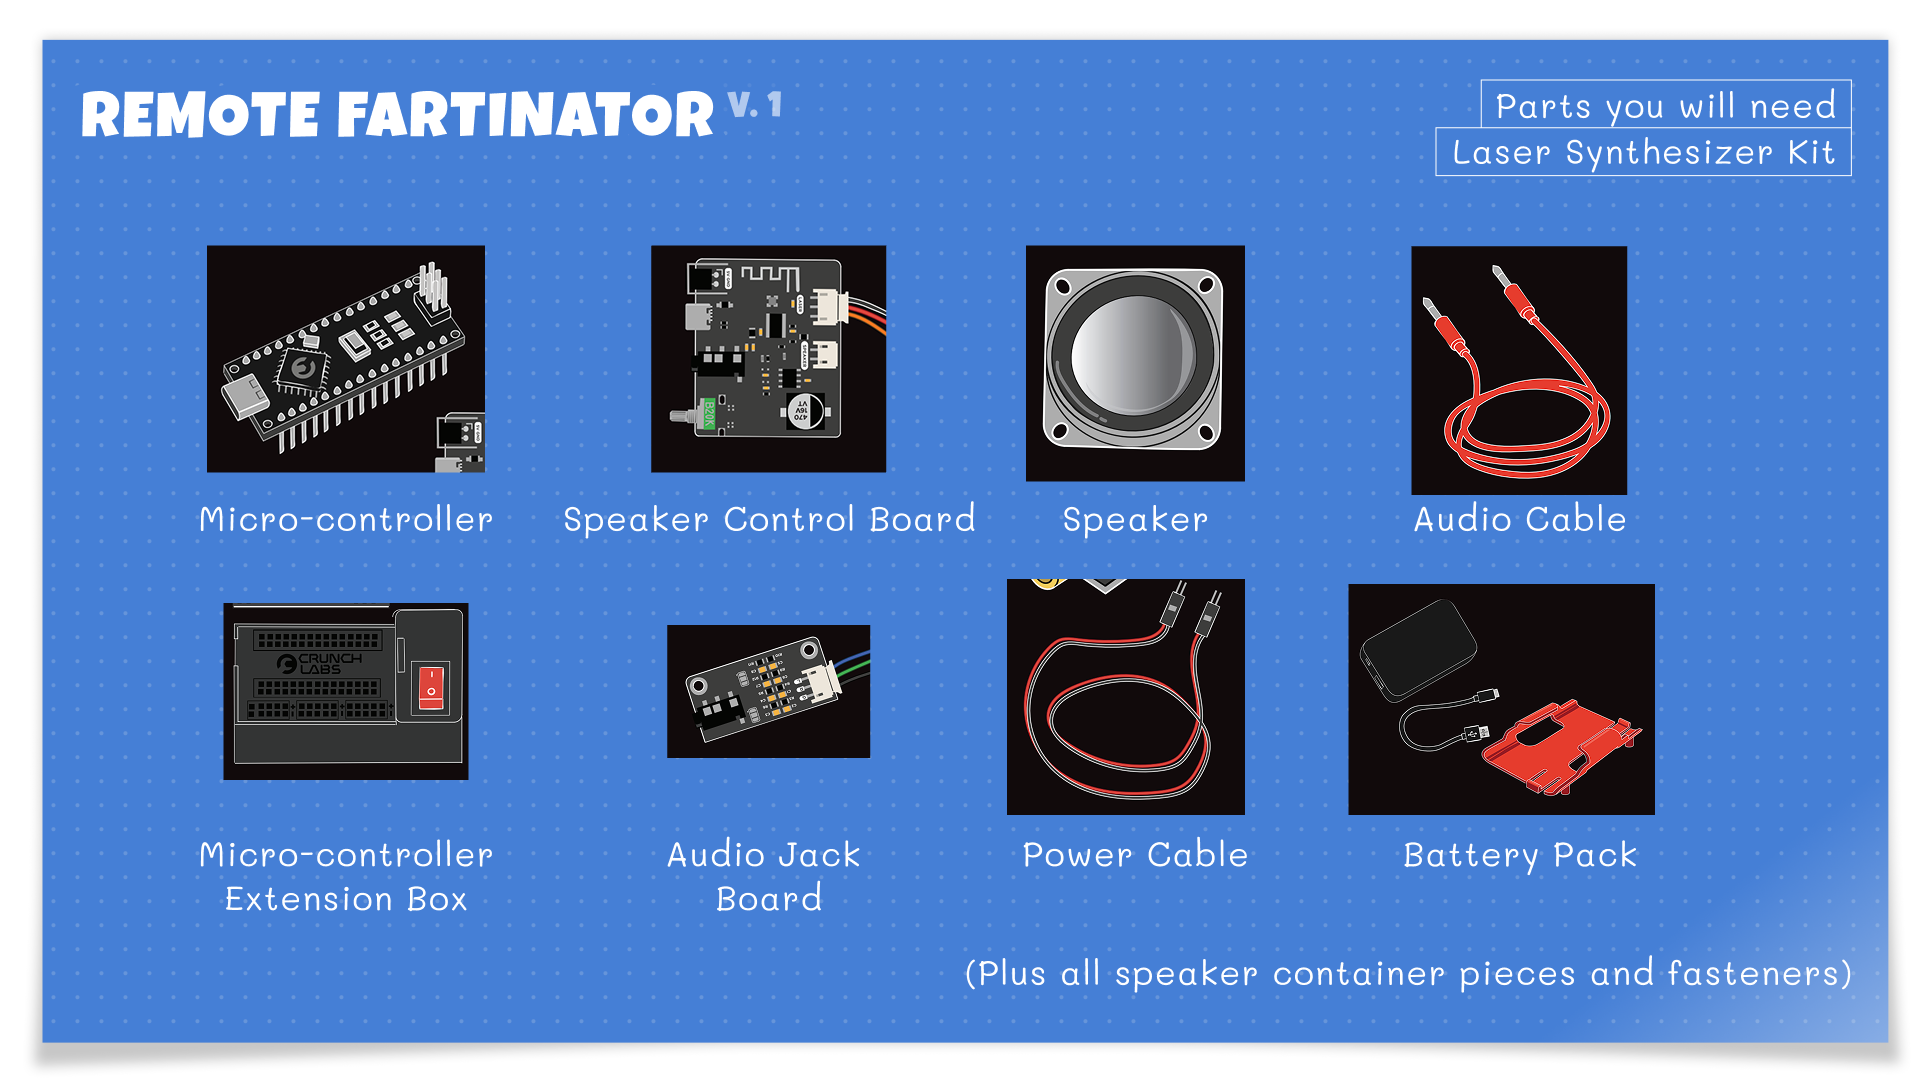
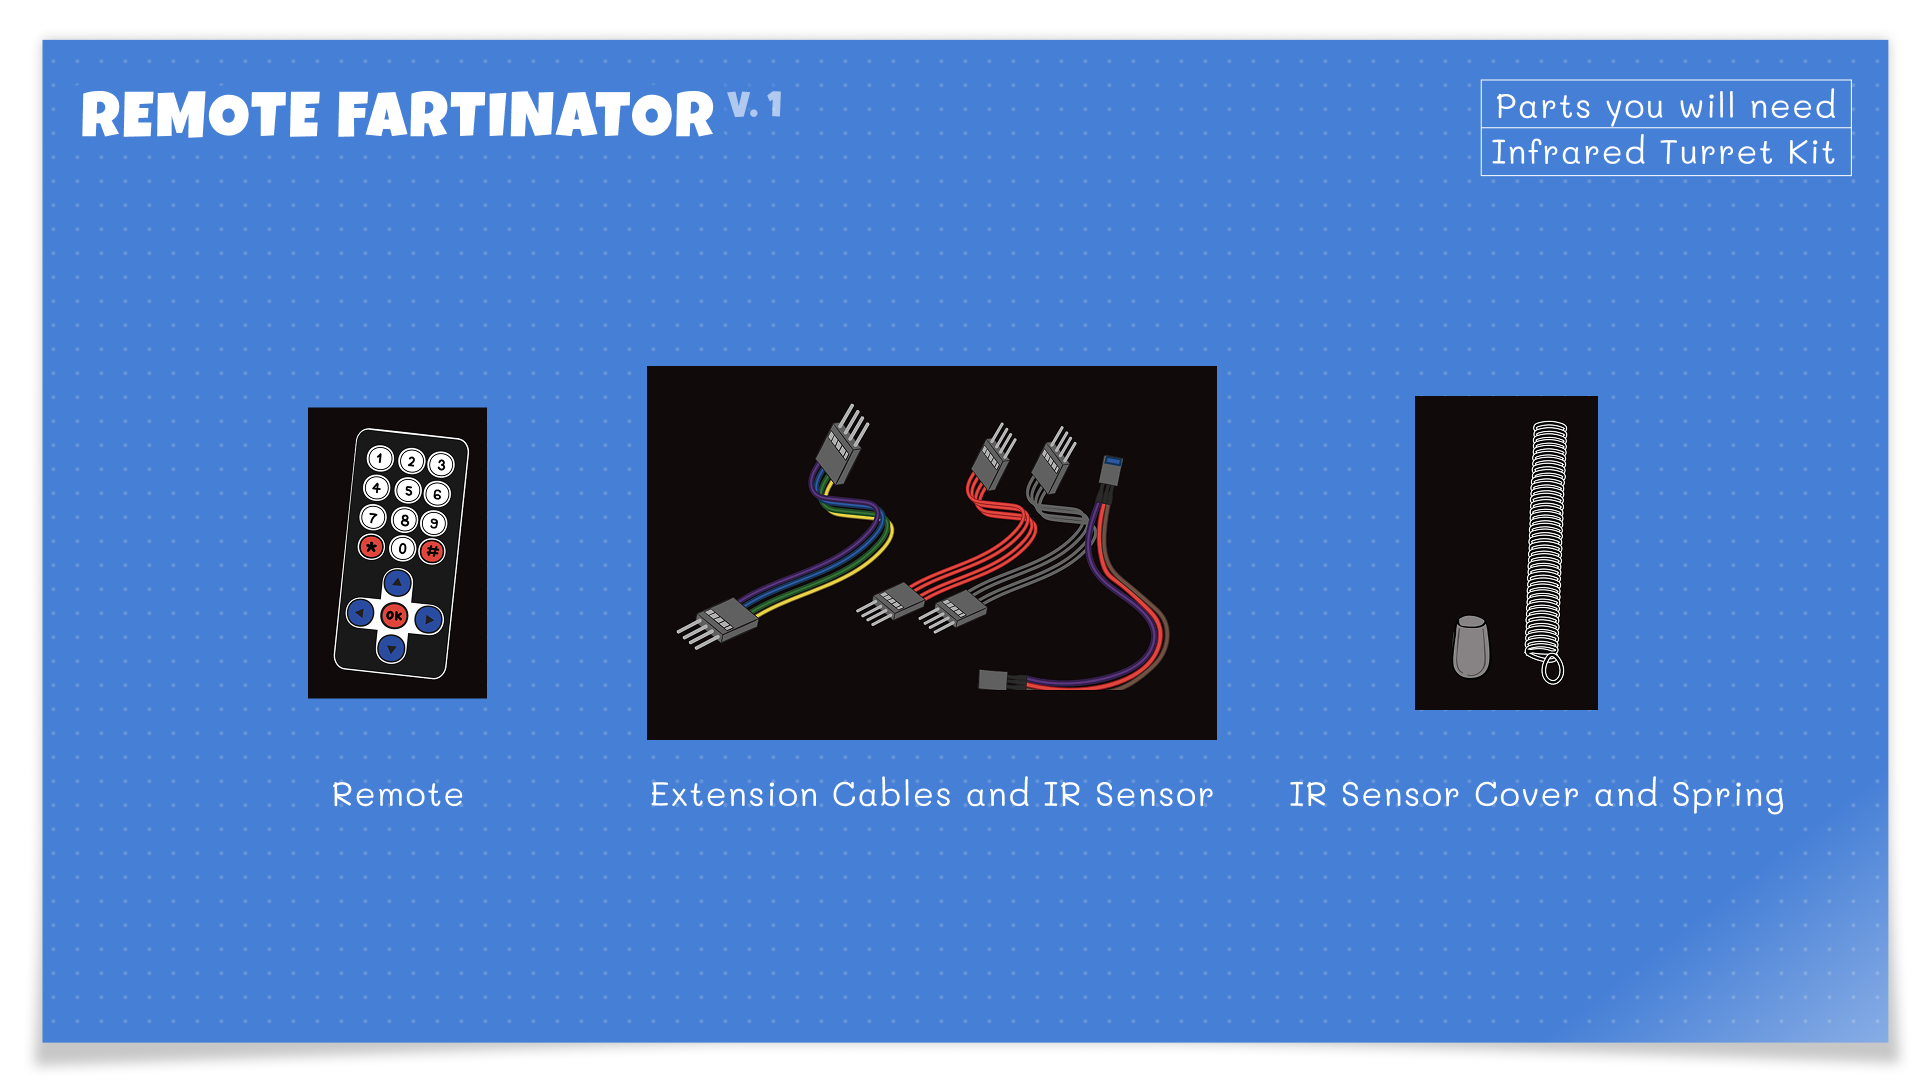
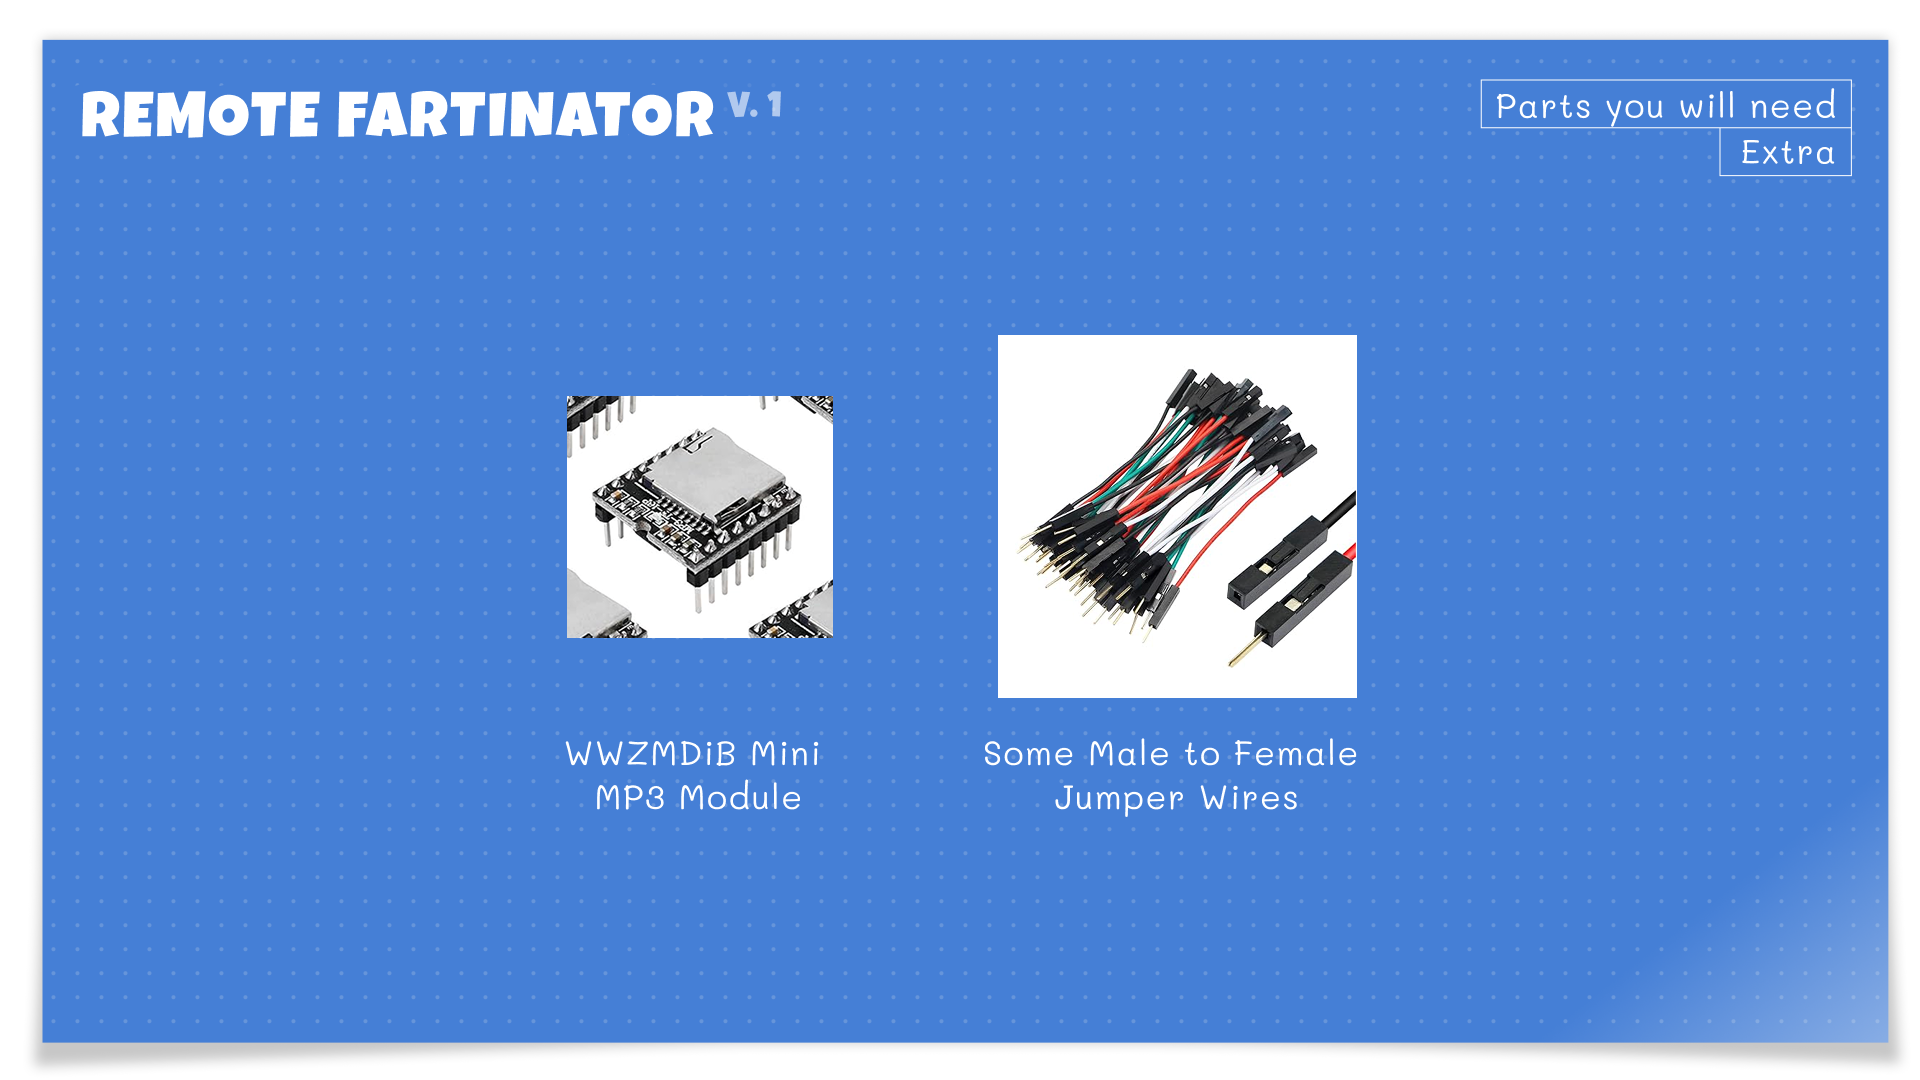
Parts you will need
We used parts from 2 Hack Packs, the Laser Synthesizer and the Remote Turret kits. Additionally we needed to purchase some electronic project jumper cables along with an MP3 / SD card board. These are very cheap and you can get a 5 pack from Amazon for about $10!
Step 1: Prepare the SD Card
Gather your Sound Effect Files. We found ours here but you can find tons of free sound effect files with a simple google search.
Format your microSD card as: MS-DOS (FAT) / FAT32
Add your sound files using this EXACT structure:
Format your microSD card as: MS-DOS (FAT) / FAT32
Add your sound files using this EXACT structure:
001.mp3
002.mp3
003.mp3
Use 3-digit filenames (
Copy files one at a time in order.
This module does NOT use filenames to order files. It will order them by which file you drop in first. So whatever sound you want as number 1, drop that file first. Then number 2, etc.. If you want to reorder, you'll need to delete all your files and re-add them in order again. Wild, I know!
001.mp3)Copy files one at a time in order.
This module does NOT use filenames to order files. It will order them by which file you drop in first. So whatever sound you want as number 1, drop that file first. Then number 2, etc.. If you want to reorder, you'll need to delete all your files and re-add them in order again. Wild, I know!
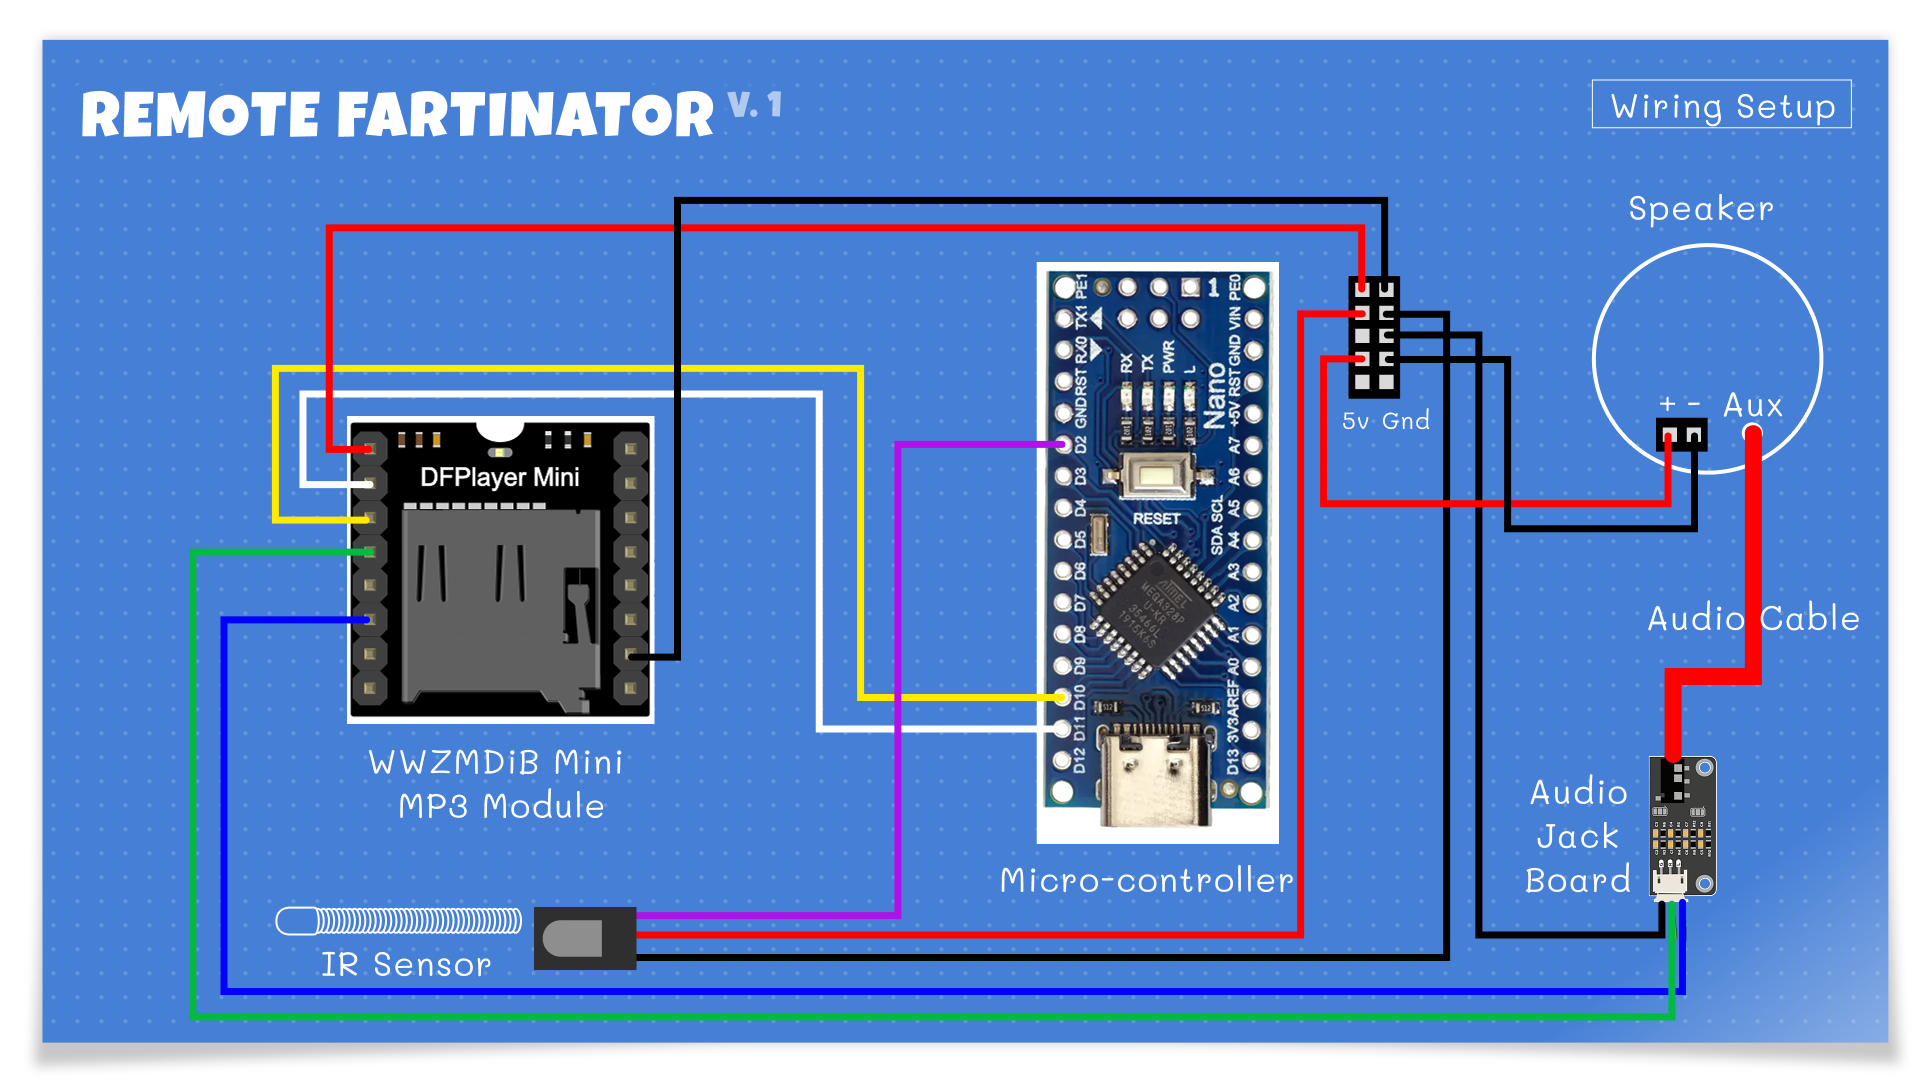
Step 2: Wiring
This walkthru assumes you have already built your CrunchLab Hack Packs but if not, follow the instructions here (steps 22 to 42) to build your speaker form the Laser Synthesizer kit. You'll need the complete speaker for this project. Next we'll wire up the microcontroller to the MP3 board.
DFPlayer Mini → Arduino Nano
| DFPlayer Pin | Arduino Nano                            |
| ------------ | --------------------------------------- |
| VCC          | 5V                                      |
| GND          | GND                                     |
| TX           | D10                                     |
| RX           | D11 *(through 1k resistor recommended)* |
DFPlayer Mini → Audio Jack Board
| DFPlayer Pin  | Audio Jack |
| ------------- | ---------- |
| DAC_L / DAC_R | Signal     |
| GND           | Ground     |
IR Receiver → Arduino Nano
| IR Pin | Arduino Nano |
| ------ | ------------ |
| OUT    | D2           |
| GND    | GND          |
| VCC    | 5V           |
Arduino Nano and Audio Jack Board → Speaker
Finally just connect the Black/Red power cable from the microcontroller to the +/- port on the speaker and plug the Red Headphone cable into the Audio Board Headphone jack and the Speaker Headphone jack.
Now your project should match the wiring diagram above or the photo below.
Now your project should match the wiring diagram above or the photo below.

Step 3: Upload the code
I used the Arduino IDE but you can also upload code via the Mark Rober's CrunchLab IDE here.
First, install these 2 libraries in the IDE by going to Tools -> Manage Libraries.
First, install these 2 libraries in the IDE by going to Tools -> Manage Libraries.
- DFRobotDFPlayerMini
- IRremote
Then, upload this sketch:#include <SoftwareSerial.h>
#include <DFRobotDFPlayerMini.h>
#include <IRremote.hpp>
// ---------------------------
// PINS
// ---------------------------
const int MP3_RX_PIN = 10;
const int MP3_TX_PIN = 11;
const int IR_PIN = 2;
// ---------------------------
SoftwareSerial mp3Serial(MP3_RX_PIN, MP3_TX_PIN);
DFRobotDFPlayerMini mp3;
// debounce
unsigned long lastIrTime = 0;
const unsigned long IR_DEBOUNCE_MS = 250;
void setup() {
Serial.begin(115200);
delay(500);
Serial.println("Starting DFPlayer + IR test...");
mp3Serial.begin(9600);
delay(500);
if (mp3.begin(mp3Serial)) {
Serial.println("DFPlayer ready");
mp3.volume(25);
delay(500);
mp3.play(1); // startup sound. Feel free to remove this. I just added it to for testing.
} else {
Serial.println("DFPlayer failed");
while (true);
}
IrReceiver.begin(IR_PIN, ENABLE_LED_FEEDBACK);
Serial.println("IR ready");
}
void loop() {
if (IrReceiver.decode()) {
unsigned long now = millis();
// debounce
if (now - lastIrTime > IR_DEBOUNCE_MS) {
uint32_t code = IrReceiver.decodedIRData.decodedRawData;
Serial.print("IR Code: 0x");
Serial.println(code, HEX);
// ---------------------------
// MAP BUTTONS HERE
// Replace these with YOUR codes
// ---------------------------
if (code == 0xBA45FF00) {
mp3.play(1);
}
else if (code == 0xB946FF00) {
mp3.play(2);
}
else if (code == 0xB847FF00) {
mp3.play(3);
}
// Add more sound buttons here
else if (code == 0xBB44FF00) {
mp3.volumeUp();
}
else if (code == 0xBF40FF00) {
mp3.volumeDown();
}
else if (code == 0xEA15FF00) {
mp3.stop();
}
lastIrTime = now;
}
IrReceiver.resume();
}
}Step 4: Map Your Remote Buttons
Open Serial Monitor (Tools -> Serial Monitor) and set the Baud Rate to "115200 baud".
Press buttons on your remote.
You’ll see codes like:
Replace the codes in the sketch with your own. I set numbers for each mp3 and used the up and down for volume. Finally, I used the OK button as stop. Play around with all of these. Set each button to do whatever you want.
Press buttons on your remote.
You’ll see codes like:
0xBA45FF00Replace the codes in the sketch with your own. I set numbers for each mp3 and used the up and down for volume. Finally, I used the OK button as stop. Play around with all of these. Set each button to do whatever you want.
Step 5: Test It
Power on the Nano
Press buttons on your remote
Enjoy remote-controlled chaos 💨
Press buttons on your remote
Enjoy remote-controlled chaos 💨


© Copyright 3008 - 2000 and LATE